Hello, today in this blog we are going to see how to integrate with the microsoft Azure active directroy (Azure AD), So that the users can sign in to the pega application through SSO by using their [Azure AD, Outlook account, Microsoft] credintials.
When you integrate Pega with Azure AD, you can:
- Control in Azure AD who has access to Pega applications.
- Enable your users to be automatically signed-in to Pega applications with their Azure AD accounts.
- Manage your accounts in one central location - the Azure portal.
Pre-requisite:
To get started, you need the following items:
- An Azure AD subscription. If you don't have a subscription, you can get a free account.
- Pega Systems single sign-on (SSO) enabled subscription.
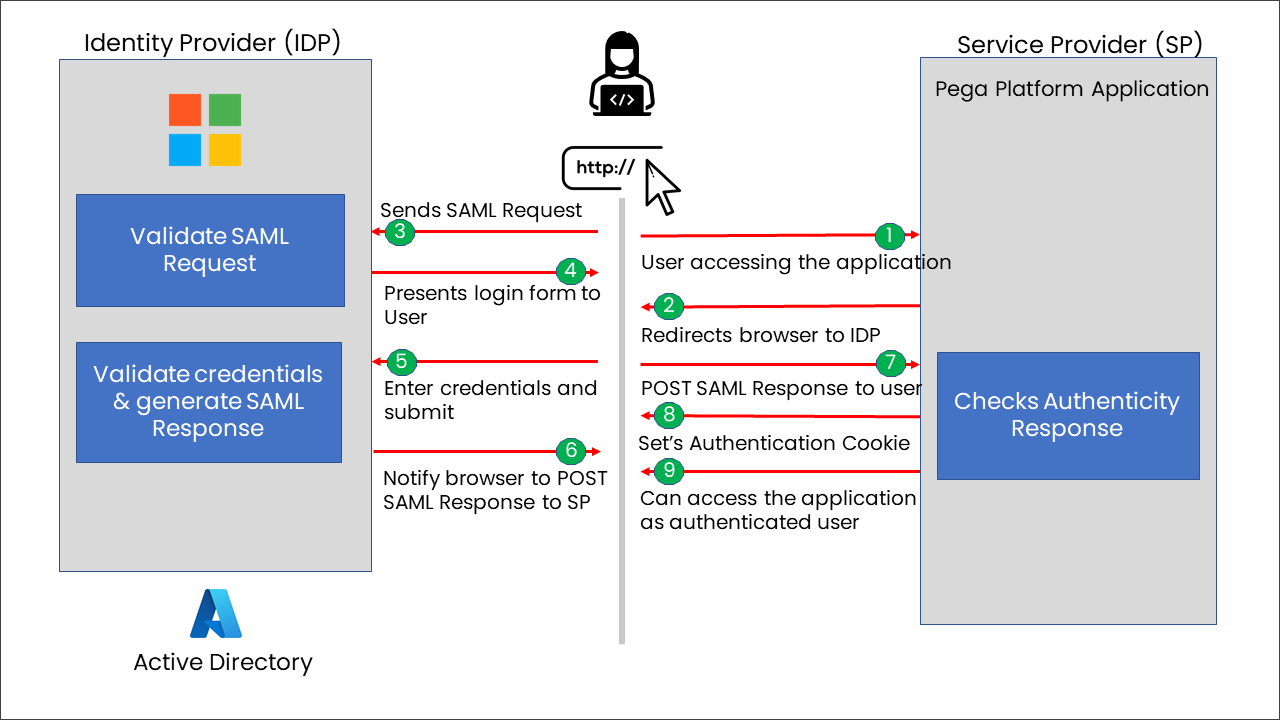
See the below image to understand how SSO in Azure AD with SAML works when user tries to access the pega..
Let's start configuring..
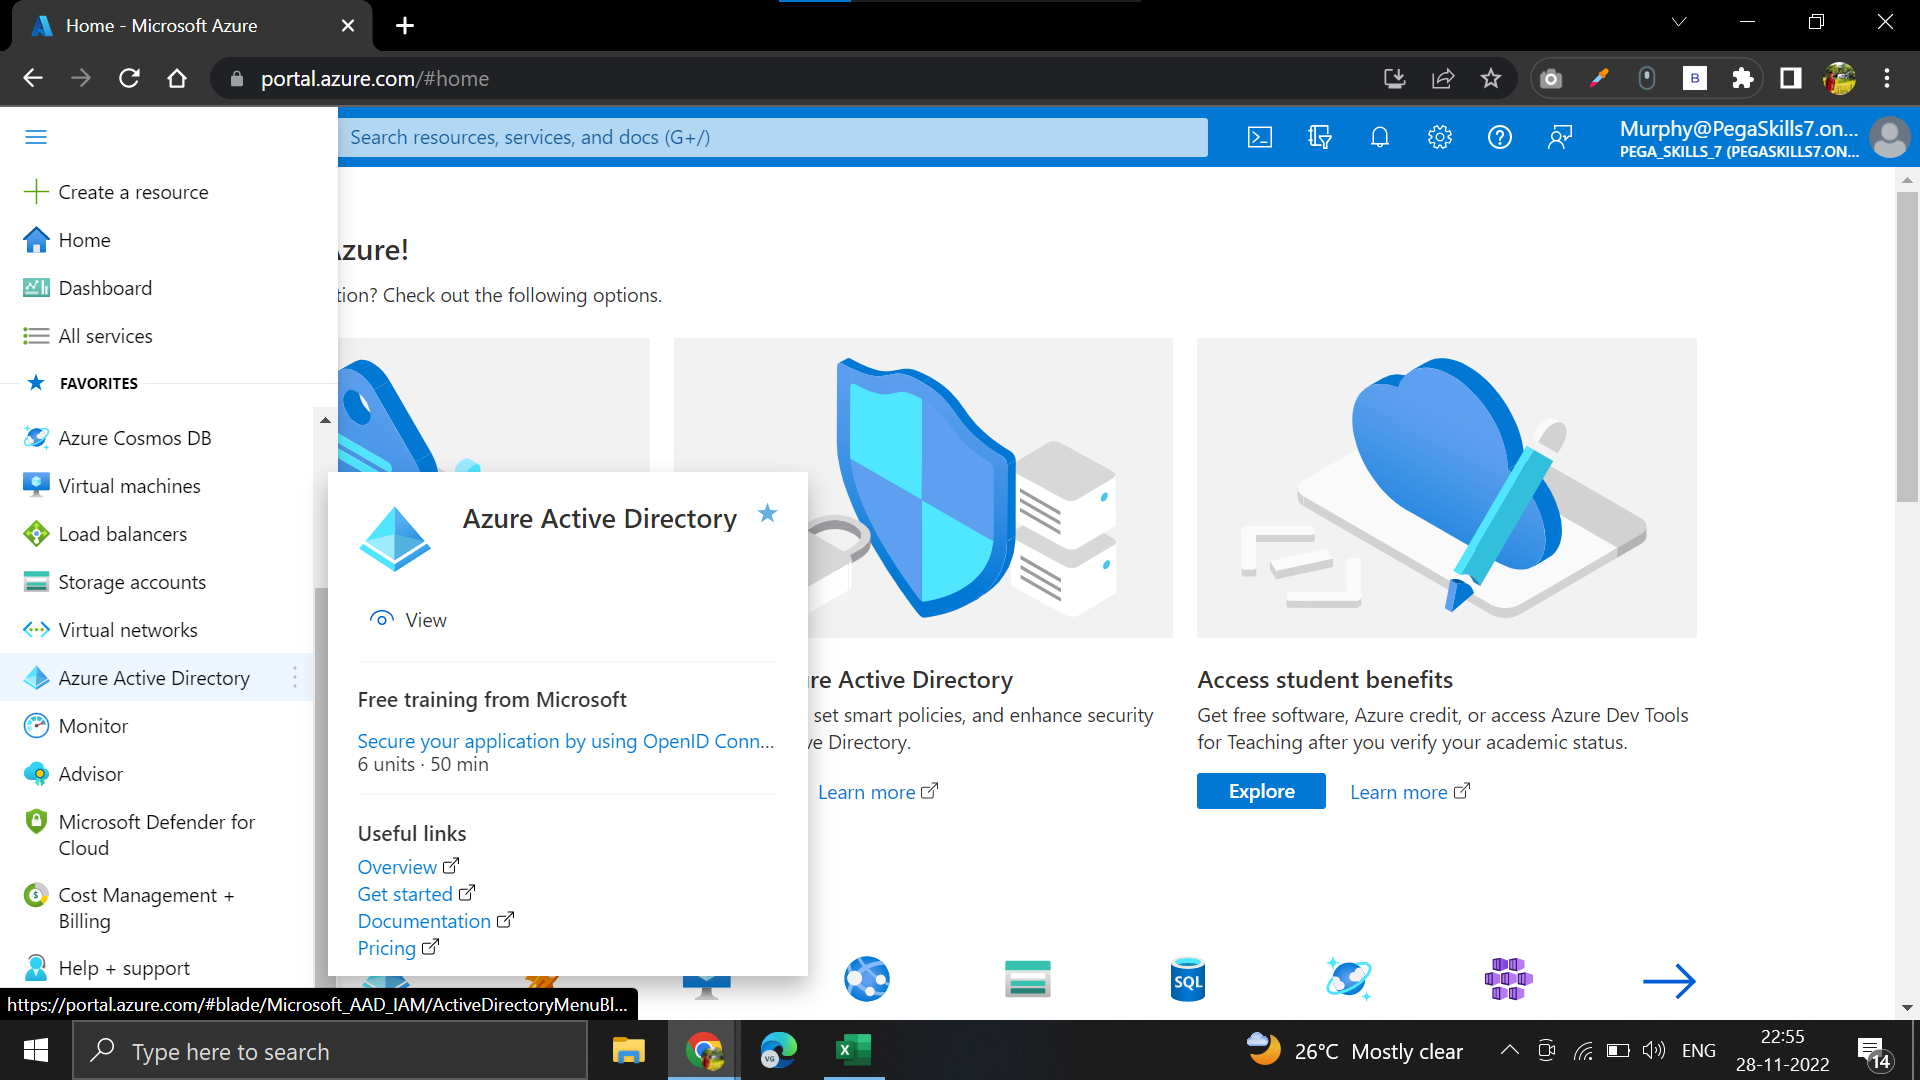
1. Open microsoft Azure portal and from left pane click on Azure Active directory.
2. After opening the Azure Active directory it will display overview now click on the Enterprise applications from left pane. then click on > All applications.
3. Now you have to click on create new application refer to below image.
4. Now in the Azure AD Gallery serach for Pega and from the results click on Pega Systems.
5. Now give a name to the application which you created as example i have given as Pega Azure SSO and then click on create button.

6. It will take some time to display the new application once it is visible then from left pane click on > Single Sign-On. And then click on the SAML on screen.
7. From above image now we have to provide the Basic SAML configuration details by clicking on Edit like below picture in the Azure AD.For that you need set-up SAML Authentication service in pega platform application.
8. After configuring Basic SAML configuration , attributes & claims in Azure AD we have to download Federation Metadata XML from Azure AD and upload it in the pega authentication service.
9. Now go to pega platform and let's get start by creating the authentication service.

10. Create new Authentication Service rule from Sys-Admin category, And select authentication type as SAML 2.0 from drop down and I have given name as Custom for authentication service rule you define your own name for the service rule as per business requirement.And short description will be populated automatically based on the name.

11. After that click on create and open, Then we have provide authentication service alias like related to application specificwe can give the name. I have gievn the alias as HRApps as i am using academy instance application.

12. We have to provide identity provider (IdP) information in Authentication service rule.For that we have to copy the service provider settings information from pega platform and paste it in Basic SAML configuration of Azure AD.

13. Go to Azure AD on click of edit provide Basic SAML Configuration details which are copied from pega authentication service rule and then click on save button.
Entity ID:
https://h0lpgq6a.pegaacademy.net/prweb/sp/1669862677
Reply URL:
https://h0lpgq6a.pegaacademy.net/prweb/PRRestService/WebSSO/SAML/v2/AssertionConsumerService
Sign on URL:
https://h0lpgq6a.pegaacademy.net/prweb
Logout URL:
https://h0lpgq6a.pegaacademy.net/prweb/PRRestService/WebSSO/SAML/v2/Logout
14. Now click on edit button of Attributes & Claims for adding the attributes.
After clicking on edit button delete all additional claims like below image.

15. After deleting the 4 additional claims now click on Add New Claims like the below 2 images mentioned.
16. Now after adding attributes from SAML Certificates click download button of Federation Metadata XML.
17. Now go to pega authentication rule and import IdP metadata via file in Identity provider information.
18. Now in Operator identifiaction select attribute or datapage reference and give "UserPrincipalName" in the field, and click on enable opertaor provisioning using model operator. 

19. And create operator with name "OperatorTemplate" and provide details like below so these details will used for new operator.And give this name in Authentication service rule like above.
20. In authentication service rule enable checkbox >Disable request signing.
21. In Mapping tab of authentication service rule give Map From , Map to like the bleow image so the details which are passed IDP will be mapped to opertaor id.
So that why we created attributes in Azure AD with those names exactly.
Then finally save the Auth rule and copy the Login URL from Auth Rule : https://h0lpgq6a.pegaacademy.net/prweb/PRAuth/HRApps


0 Comments